


Devolutions Server user groups based security allows to create a granular protection system that is quite flexible. However, flexibility comes at a price and sometimes making the wrong choices could increase the time involved in managing the system.
The following recommendations are based on our experience with the system and the ideas shared by our community. Follow these guidelines, as they will help you to use the Devolutions Server user groups based security efficiently.
Here are the main key points of the user groups based security:
- Security is inherited: child items and folders are covered by a parent folder’s security.
- Permissions can be overridden: a permission set on a sub folder will override the parent item’s permission.
- Permissions are granular: multiple permissions can be set on entries at once.
User groups configuration
When using Devolutions Server user groups based security, user groups are mostly used to control user access for multiple users at once.
Create the user groups
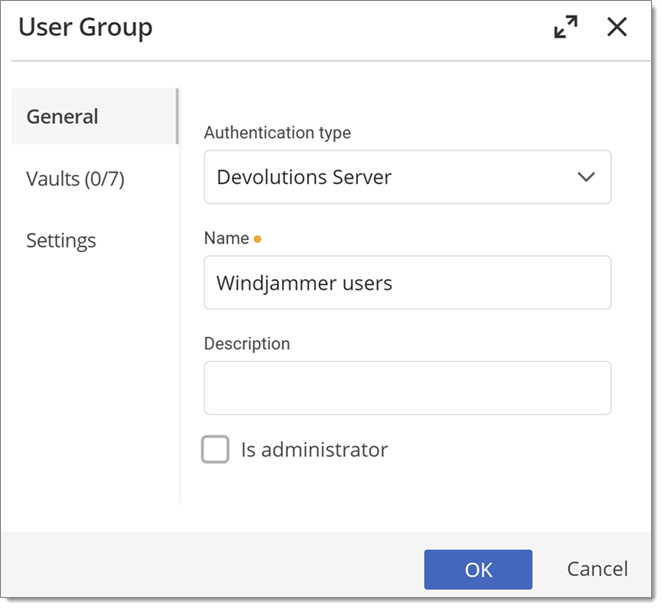
To create user groups, navigate to Administration – User Groups, then click Add.
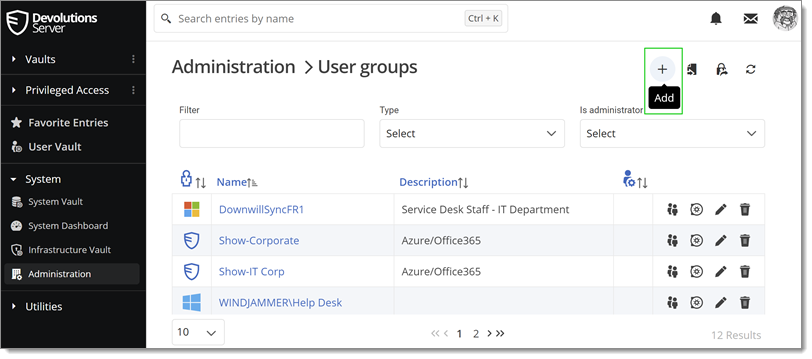
All settings can be left to default unless the user group contains only administrators. In this case, check the Is administrator box when configuring the user group. Enter a name and a description for the user group, then click OK. For Active Directory groups, the domain must be provided like the following.
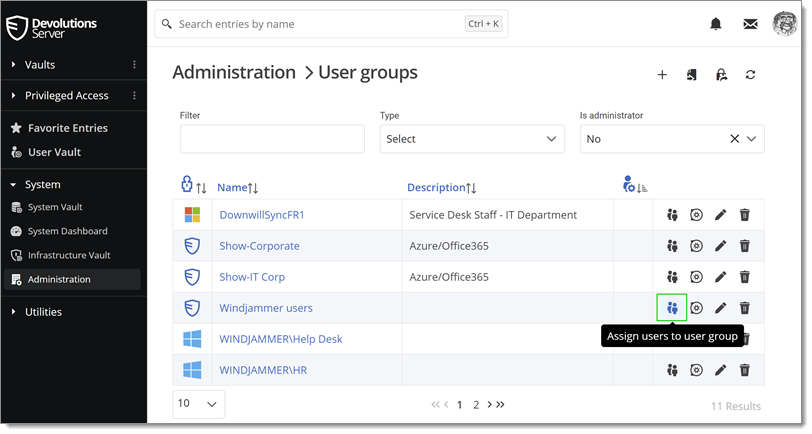
To assign users to the user group, click Assign users to user group. With a user group created from an Active Directory group, there is no need to assign users as it is automatically managed by Devolutions Server.
User configuration
User template
It is possible to change the default user template. To do so, navigate to Administration – System Settings – User Template. These settings control the default settings of a new user. The best practice is to disable all privileges.
Create the user
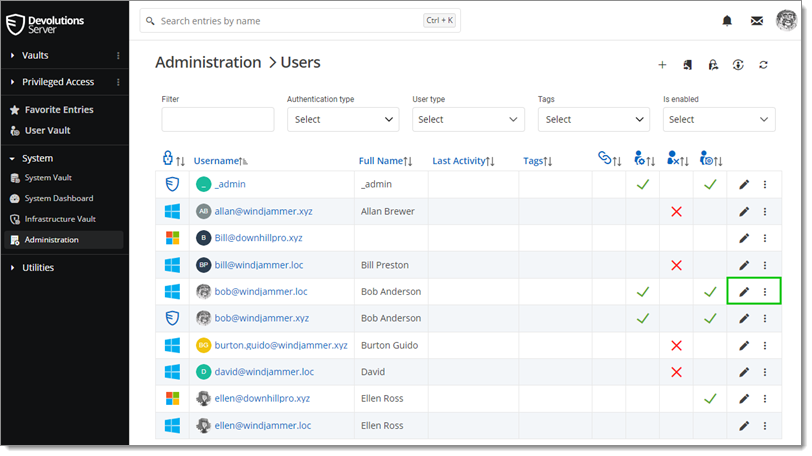
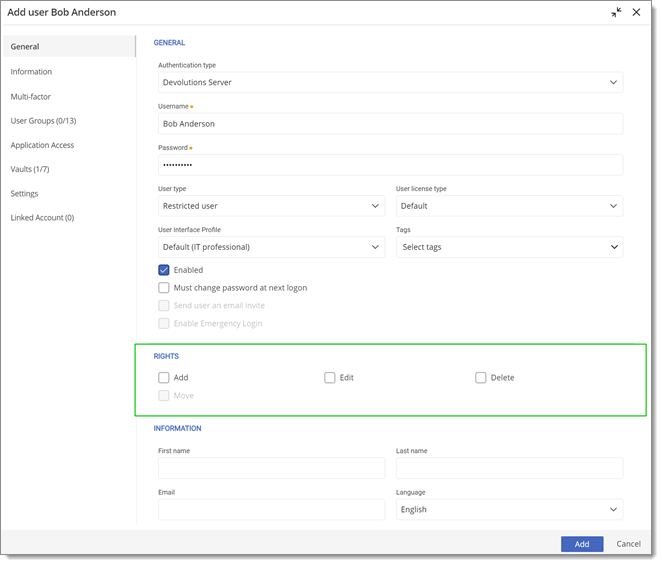
To create users, navigate to Administration – Users, then click Add User. Enter the information and click Add to save.
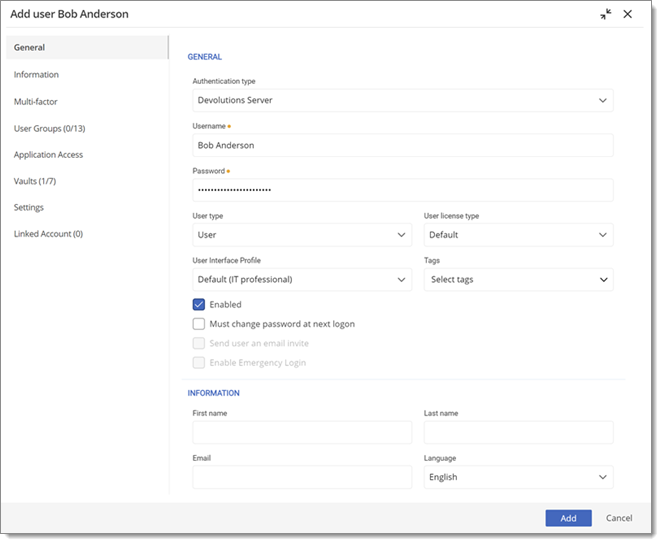
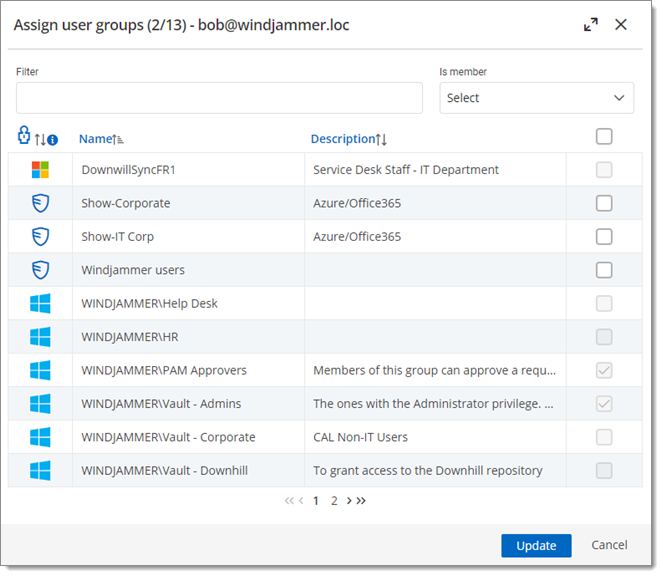
A user can be assigned to multiple user groups at once by clicking Edit – User Groups or More – Assign user groups. As part of the Active Directory integration, there is no need to assign users to those user groups as it is automatically managed by Devolutions Server.
Select the user groups you want to assign to the user and click Update.
Administrators
Administrators can do everything, regardless of the security. These users are usually the chief officers and senior management.
Restricted users
Restricted users have limited access to resources. They usually have the Add and Edit rights only. These users can be mid or first level technicians, such as service desk and help desk.
Users
Users also have limited access to resources, much like Restricted users. However, they have by default the Add, Edit, and Delete rights and can perform these actions on all unsecured entries.
Read only users
Read only users can only view and use resources, but cannot edit them. These users are usually external consultants.
Select the appropriate user type
When creating users, some key points must be taken into consideration. Ask yourself the following questions while configuring a new user:
- Should they be able to access any resource without restriction?
- Administrators can access any resource without restriction.
- Select Administrator as the User type when creating the user.

- Should they have the right to add, edit, delete, add in root, and move entries?
- If so, select User as the User type when creating the user. Users have all those rights by default.
- If not, select Restricted user as the User type when creating the user. You can then manually select which rights to grant to the user.
Entry configuration
Access is granted or denied to users by setting permission on entries. Permissions can be set to users or user groups. The best practice is to grant permissions to user groups to control access for multiple users at once.
To set permissions on an entry, edit any entry, enable Advanced, then navigate to the Security – Permissions section.
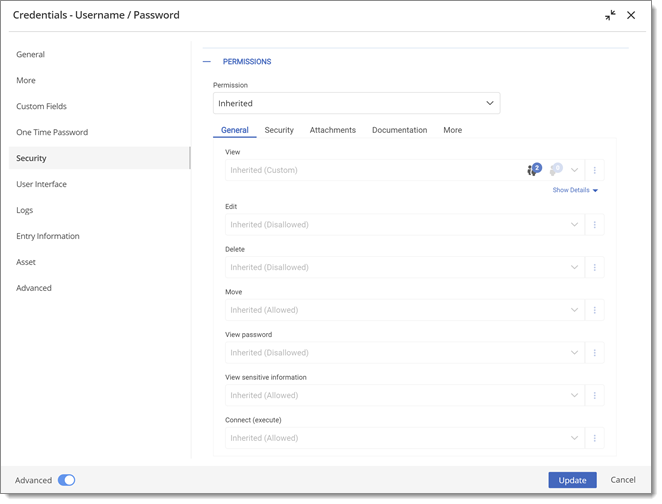
Permissions are usually set on folders, and apply to all child entries. A best practice is to set all the permissions of the vault folder to Disallowed. As a result, all permissions of all entries are denied by default.
Access is denied to users by expressly granting the access to other users. In other words, all users that are not on the list of a permission have the access denied.
For a user to have access to a sub folder, the user must have at least the View permission on all parent folders.
Consider the following structure:
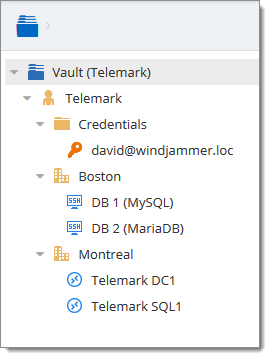
There are three levels of folders: the vault, Telemark, and child items of Telemark.
Suppose that a user, such as a consultant, must have access to the Montreal folder only. The consultant must be granted the View permission on the Telemark folder as well. However, granting the View access to the Telemark folder gives to the consultant the permissions to view all child items of Telemark. To deny the View permissions for the consultant on specific child items, the View permissions of these items must be expressly set for other users.
